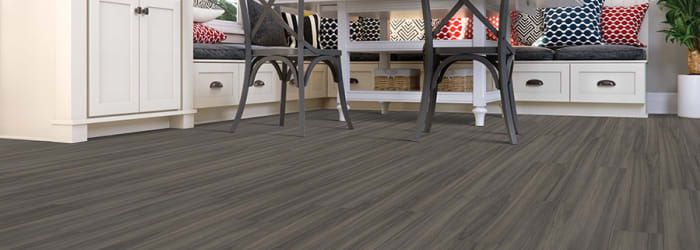
Your flooring choice is one of the first things people notice when they enter a room. Updated flooring in good shape can make a big difference in the impression you make when someone enters your home, but paying a contractor to replace your floors can be pretty expensive, especially if you’re on a budget.
At Floor Systems, we frequently work with homeowners who want to tackle a flooring project themselves, so we’ve put together some of our top tips to help you succeed if you’re redoing your floors on your own.
1. Carefully Select Flooring Materials
There are many materials you can choose from for your floors. On the more budget-friendly side of the spectrum is vinyl, laminate or tile. Consider the attributes outlined below to help you figure out which material may be best for your project.
Engineered Hardwood Flooring – If you’re looking for something durable that will last a lifetime, engineered hardwood flooring should be your go-to option. Additionally, it’s more cost-effective than solid hardwood.
Laminated Flooring – Laminated flooring is easy to install and allows you to refresh your space on a budget. You don’t always have to do an extensive remodel with laminate flooring; you can even replace one section at a time if that works better for your budget or for your scheduling needs.
Floorigami – If your goal is to completely rework a room’s personality or to add a little bit of cozy comfort to your space, Floorigami should be your go-to option. It also offers unmatched design flexibility and is extremely easy to install.
Tiles – Tiles can be an equally good alternative to hardwood flooring or carpeting. It can give you the gorgeous look of wood, natural stone, and a myriad of other materials with incredible durability and easy maintenance.
2. Take Accurate Measurements
You should pay extra attention when it comes to taking measurements of your flooring space. Accurate measurements will help you order just the right quantity of all the materials you need for your DIY project and you won’t end up ordering too much or not enough. It’s always a good practice to measure (at least!) twice.
3. Prepare the Subfloor Properly
Before you take on your next flooring project, it’s essential to make sure that the floor you’re working on is clean, dry, level and structurally sound. Take a moisture reading of your subfloor with the help of a moisture meter or do a calcium chloride test. If there is any moisture in the subfloor, it can cause issues like warping and swelling in your floor over time. This can lead to irreversible damage which will be costly to replace. Testing before beginning the project will help you avoid costly, time-consuming repairs in the future.
4. Carefully Set Up Your Workspace
Being organized will make your flooring project much easier to manage. It is important to keep the space you’re working on clear and uncluttered so that you are not constantly tripping over yourself. This will also help to keep your subfloor clean and dry throughout the project.
5. Allow for Expansion
Flooring materials such as timber and laminate have the tendency to expand or contract with changes in temperature and humidity. Therefore, while installing your new floor, make sure you maintain a half-an-inch expansion space around immovable objects. These include walls, fireplaces, kitchen cabinets and other fixed items. Do not forget to undercut your door jambs and casings to allow friction-free movement.
Contact Us
Your DIY flooring project has the potential to transform your space, make it more functional and boost your home’s property value.
If you need any help picking the material for your floors or need further advice on your project, feel free to call us at (207) 353-6690 or visit our store in Lisbon, Maine. Our expert staff would love to help you make your DIY flooring project a success.
Leave a Reply